This page teaches how to preform the Fridge Defend by ARP temperature sensor install which prevents Dometic & Norcold RV refrigerators from overheating, thereby improving RV safety.
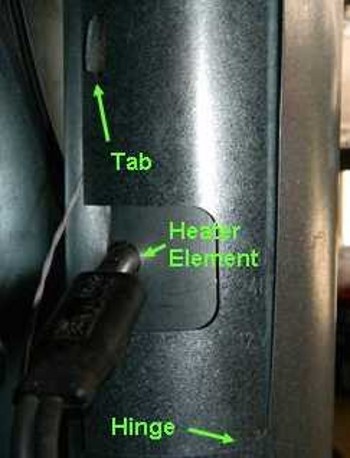
This photo shows a typical boiler housing electric heater access door for either the Dometic or Norcold absorption refrigerator. The boiler temperature probe install procedure is similar for all cooling units, the cooling units differ from manufacture to manufacture, see specific install pages for more details.
The tab identified in this photo holds the door shut. One can gently bend the tab so that the door will open from the tab side of the door. If the heater element can be twisted a little, it may need to be moved to allow the door to fully open. Otherwise, the sheet metal may be bent to clear the heater element. The door can be bent back into place upon re-installation of the door.
The lower hinge is seen to the lower right in this photo; the upper hinge is not within view. Once the door can clear the heater element, push the door up - this will disengage the lower hinge. Slide the lower hinge out of the boiler housing, and then allow the door to drop down so that the upper hinge disengages. For installation, just reverse this process.
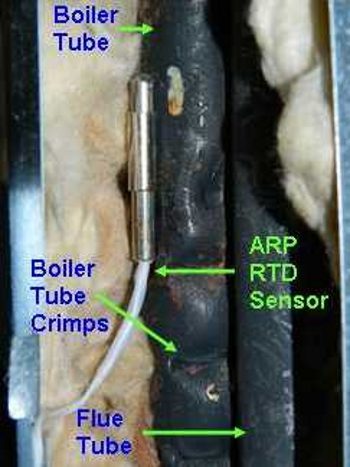
This next photo shows the heater access door removed and the insulation removed so one can see the tubes within the boiler housing.
The insulation within the boiler housing is pushed to either side of the flue and boiler assembly to gain access to the boiler temperature probe install location. If necessary, the insulation may be temporarily removed by pulling a section of insulation away. Please keep track of how each section comes out for the re-installation process.
Identify the flue tube. As a rule of thumb, the flue tub is the front tube on most Dometic units (Exceptions include RM8xxx series). The flue tube is at the back of the boiler tube for most Norcold units (Exceptions include N3150, 4150 & Polar 7, 8, 10 series). The ARP temperature probe cannot be mounted on or near the flue tube. Also, the flue tube will cause a false reading if the sensor is near the flue tube so that it can pick up heat from the flue - more on that below.
Identify the boiler tube. The boiler tube is where the entire refrigeration process is driven, thus, this is the tube where the ARP Temperature Probe is installed. There are a number of features that will help identify the Boiler Tube:
a) The Electric Heater Element Tubes and the Flue Tube are welded directly to the boiler tube.
b) There are crimps (folds) on some (not all) of the boiler tubes.
IMPORTANT - The boiler temperature probe install procedure requires the placement of the boiler sensor above these crimps 'if possible', the probe head must make contact with the boiler tube. Because it is not always possible to access the boiler tube where there are not crimps, one can mount the sensor on the boiler tube crimps if needed, make sure the top of the sensor makes contact with the boiler tube.
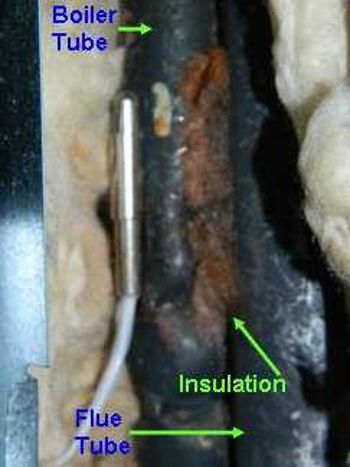
This photo shows insulation packed between the flue tube and the boiler tube. A screwdriver was used to push the insulation between the 2 tubes. This step of insulating is not always needed if access between the 2 tubes is not practical. For example, Norcold flue tubes are behind the boiler tube. In this case , be sure to push the insulation around the back side of the ARP Temperature Probe.
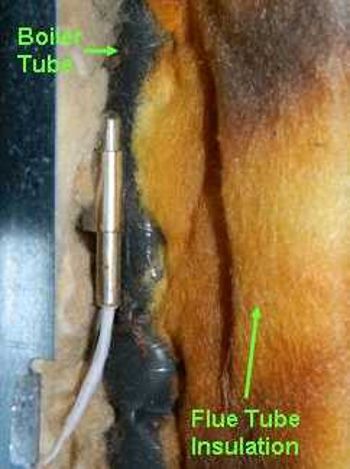
This next photo shows insulation placed over the flue tube and between the ARP Temperature probe and the flue tube so that heat cannot be transferred from the flue tube to the ARP Temperature Probe. This step improves the overall efficiency of the absorption refrigerator and the ARP Control.
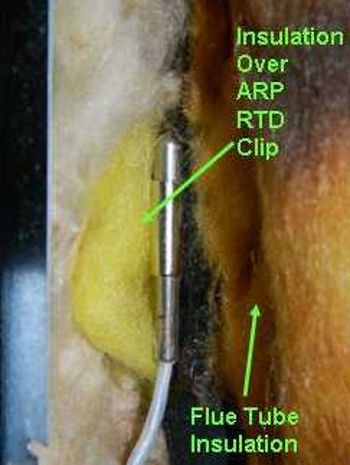
This photo shows the packing of insulation around the ARP Temperature Probe. This insures that the clip is not transferring unwanted heat from any of the tubes to the Temperature Probe.
The idea here is the Temperature Probe should only be measuring the boiler tube temperature.
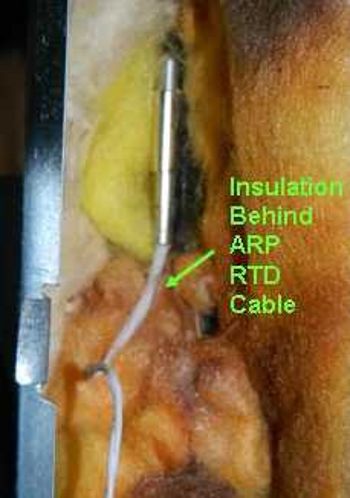
This photo shows the insulation placed between the Temperature Probe cable and the boiler tube. The Temperature Probe cable can also transfer heat inadvertently to the Temperature Probe. Thus, fully insulating the cable until it exits out of the housing is very important. Insulation around the Fridge Defend temperature sensor cable will keep the sheet metal boiler housing from cutting the wires.
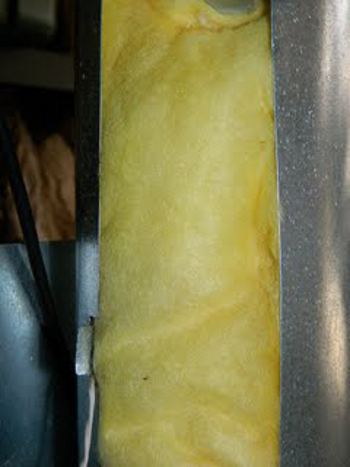
The photo to the left shows the boiler housing fully insulated so that no cold air can enter nor heat escape.
Re-install the heater access door by reversing the process described above. Your boiler temperature probe install is complete.
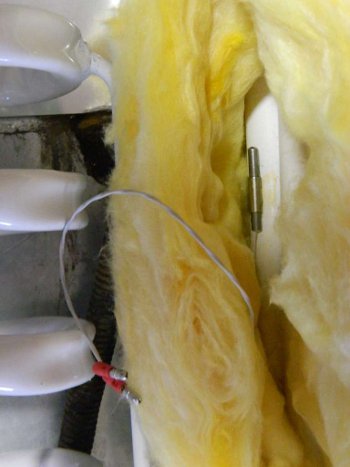
This photo is an example of an install on a brand new Amish cooling unit. If you have the cooling unit out of the RV or coach, install the temperature sensor so you can get to it once the fridge is installed.
If you order a cooling unit from Pines or JC Refrigeration, they will install the sensor on your cooling unit if you request this service. What a value!
The Boiler Temperature Probe Install process is very important for the success of your ARP Controller and the refrigerator itself. Please be sure to follow these instructions and insulation placements very carefully for successful RV'ing fun!